Have old picture frames laying around and don't know what to do with them? Here's a project that turns something old into something new!
I recently moved and discovered that one of my picture frames wasn't so lucky to make it here alive! (broken glass). So instead of throwing the lovely frame away.. I decided to revamp this old picture frame into something new.
For this project you will need:
Scrap fabric of your choice (2 different types)
Hot glue gun/ sticks
total cost for this project about $4 dollars or in my case (totally free :) )
Step 1: take the glass out of the picture frame and remove the back card board
Step 2: cut out fabric large enough to cover the front end of the cardboard
Step 3: Glue fabric to card board to provide a back drop for your picture frame
Step 4: Find a flower pattern of your choice and cut out pattern pieces. (in my case i used a square then trimmed edges to make a rounded rectangle then i glued the bottom piece of the flower to form the shape of the petal)
Step 5: Design pieces to fit in a pattern then glue down in its proper space
Whala!! you have a brand wall art for your newly
decorated home!
Thursday, October 20, 2011
DIY Picture Frames (Decorate Your Home Series)
Labels:
broken glass,
decorate your home,
design,
design your home,
diy,
fire place decoration,
flower,
picture frame
Monday, October 17, 2011
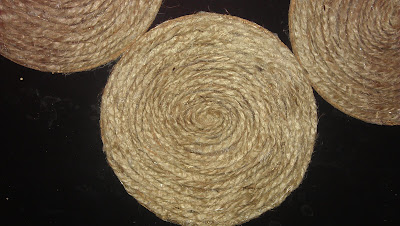
DIY Twine Coasters (Decorate your home series)
For this project you will need:
(twine, cork coaster, hot glue gun)
I brought some twine from walmart (also available at the dollar tree for 1 dollar) and some cork coasters from Ikea for 99 cent
Step 1: Start your gluing around the coaster edge and continue around until you reach the next row. (I glued the edge down towards the center so that I could cover it up with the twine as I went around the coaster.
SN: as you can tell I chose to use the non decorative side so that way the coaster can be exchanged between the designs so its kind of like a two for one deal! (smart right?? I know... HA!)
Step 2: Continue gluing the twine around the coaster until you reach its center.
Easy as pie right??? Hope you enjoyed this post and try it for yourself! These not only decorate your home but make great housewarming presents as well!
Labels:
character,
costers,
decoration,
diy,
for the home,
twine
Subscribe to:
Comments (Atom)


